I will guide you step by step in my journey on how to make the best DIY speaker cable.
The importance of audio system wiring can be considered equal to the quality of the audio components. The first wires that audiophiles began to consider an important part of the audio chain were the speakers, followed by the connecting ones, and finally the current ones. The first man mentioned in the context of the audio cable is named Robert Fulton, whose ups and downs around making laboratory equipment to test animal hearing resulted in the first insights into the impact of cable on the audio system sound. Along with the American Fulton, the Frenchman Jean Hiraga and the Japanese Saboru Egawa are mentioned as pioneers of audio wiring. The first research in this field took place in the 1970s.
To date, the emergence of more and more wiring manufacturers has led to significant investment in research and the development of new ways to make good audio wires. Although this part of the audio chain does not have much support in the professional circles of audio professionals and scientists, to date some literature has emerged in which technical basics can be learned that provide guidelines for the design of better audio wires. And there are many, in the nature of propaganda, texts of various manufacturers, which must be taken with some reservations, and which provide insight into some of the research in this area.
The greatest scientific contribution could certainly be attributed to Professor Malcolm O. J. Hawksford, whose article in HiFi News & Record; The 1985 review, entitled “The Essex Echo: Malcolm Hawksford looks at Maxwellian theory & interconnect memories,” connects the theoretical background in microwave electronics applied to audio cable design. This work could be considered a turning point that has guided many future researchers in this field.
This introductory part of the instructions for making DIY speaker cables hinted that behind this design is not random experimentation in search of better speaker wires, but the desired results were obtained based on well-known guidelines in audio wire design and, now for many years, experimenting with their making.
Best DIY Speaker Cable – Guidelines
Contents
Not to dwell on the theory behind this, I will only list the basic guidelines on how to make your own audiophile speaker cable:
- Minimum series inductance
- Minimum series resistance
- Better dielectric properties of the insulator
- The best possible material and shape of the guide
- Available material
- Moderate price
It is safe to say that there is a consensus on the technical requirements for speaker cables that the key parameter affecting their quality is their series inductance and low and frequency linear resistance. In my experiments so far, and this was predicted by the above theory, the best material for making speaker wires proved to be full cross-section cable. With this knowledge, I also noticed that for the best overall sound, it is necessary to use conductors of a large overall cross-section. But here the problem arises because the large overall cross-section and frequency linear resistance are somewhat contradictory requirements. As a solution to this problem, the use of several thinner conductors is imposed, which then satisfies both conditions. Once we have set these conditions for construction, it remains to be seen how to meet the demand for low series inductance. This is where the geometry of the conductors inside the cable comes into play.
Satisfaction with the first design guideline is usually achieved by the following configurations:
a) by alternately placing + and – lines

b) thin and narrow lines, located at a small distance

c) different ways of intertwining + and – lines (a better-known example is Kimber)
Best DIY Speaker Cable – Basic Concept
For this design, a modified configuration a) was used, in such a way that the wires were arranged “in a circle” around the supporting core. Thus, the usual round cross-section is achieved, and practicality is in use because good mechanical resistance and durability of the entire structure are achieved.
24 conductors were used in the construction of this cable. 12 for plus and 12 for minus. Alternating the laying of + and – wires reduces the series inductance, and at the same time, low cable resistance is achieved due to the number of wires used.
The wires themselves are derived from a Y (ST) -Y type cable, which is normally used for telephone installations and is available at local electrical supply stores. The wires have a diameter of 0.8mm, which is the diameter at which the theory predicts that there is no skin effect at the highest audible frequency of 20 kHz, or that the depth of penetration of current in the conductor affects its center.
The core to which the whole construction fits is a hemp rope, 12mm in diameter. Although I was unable to find the dielectric constant and dielectric loss factor (tan Δ, TD) for hemp, I had a feeling that as natural material hemp could do well for this application. All the more so because cotton is used for a similar role, with good results. These would be the most important materials for this cable. Further details can be found in the cable stacking description, which follows.
Best DIY Speaker Cable – Recipe (for approx. 2x2m cable):
Ingredients:
- 9 meters of Y (ST) -Y cable, consisting of 6 pairs (1 pair = 1 “+” and 1 “-) (0.8 mm diameter wire)
- 4 meters of hemp rope, diameter 12mm
- 7-8 rolls of plumbing Teflon tape
- 4 m “snakeskin” decorative sleeve
- 1 m each of red and black thermal hoses 7-8 mm in diameter
- 1 m of black thermo-hose diameter 16-20 mm
- 8 speaker connectors on request, I recommend “locking” bananas 4 mm
Procedure:
1. cut Y (ST) -Y cables to the desired size (2.25m pieces). For one speaker cable, we need two lengths of “raw material” of 6 pairs since we have a total of 12 pairs or 24 wires.

Cut the cables to the desired length
2. Disassemble the Y (ST) -Y cable into the basic components: pairs, aluminum foil, and “drain” bare copper wire.

Disassemble the cables
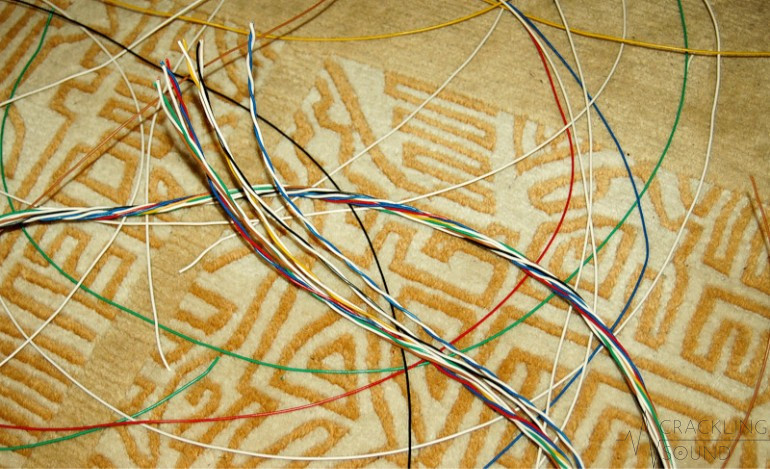
Disassemble the cables further
3. cut the core rope to the desired size (approx. 1.85 m)

Align cables together
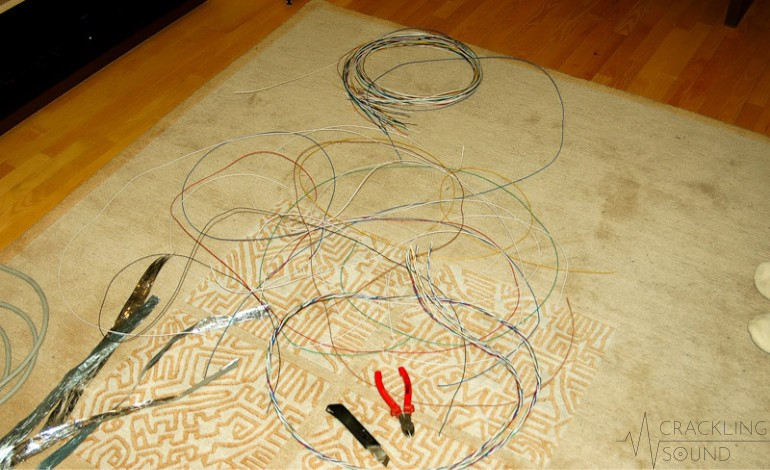
Cut the core rope to the desired size
4. arrange the wires at one end of the rope, and start wrapping with PTFE sealant tape. This part is easiest to do by wrapping one guide first. Then in each subsequent PTFE sealant tape coil, one + or minus conductor is added alternately until all 24 are assembled. Before wrapping, try to assemble all 24 conductors to get a sense of how to stack them so that they all fit.
Arrange the wires and start wrapping

Close-up of the wrapped wires
5. wrap the wires around the core to the end of the cable. Make sure that the wires go slightly spirally around the core because if they are laid straight from start to finish, the cable will be very stiff. This part of the process is really demanding because you need to constantly untangle these 24 wires and be careful not to lose their arrangement from the beginning to the end of the cable. It is best to work part by part of the cable, with enough breaks between the stages of wrapping.

Wires are aligned around the rope core

Constantly untangle wires to avoid a mess like this
6. sort the + and – conductors at the ends of the cable (for + I used all white and red, for – all others)

Sort + and – conductors
7. Wrap the cable wrapped in this way with two “drain” bare copper wires and wrap with aluminum foil. At one end of the cable, these drain wires will be connected to the – wires, while at the other end they will remain unconnected. Wind the aluminum foil so that the conductive (smooth and shiny) side is towards the drain wires.
Wrap the cable with foil
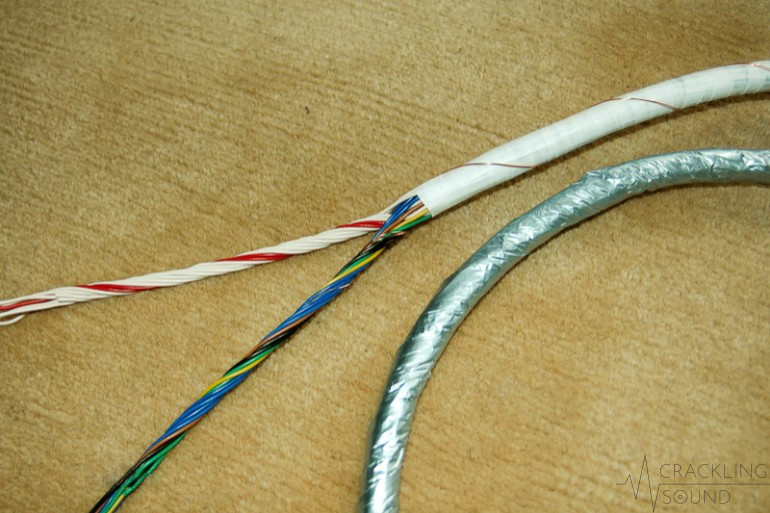
Close-up of the almost finished cable
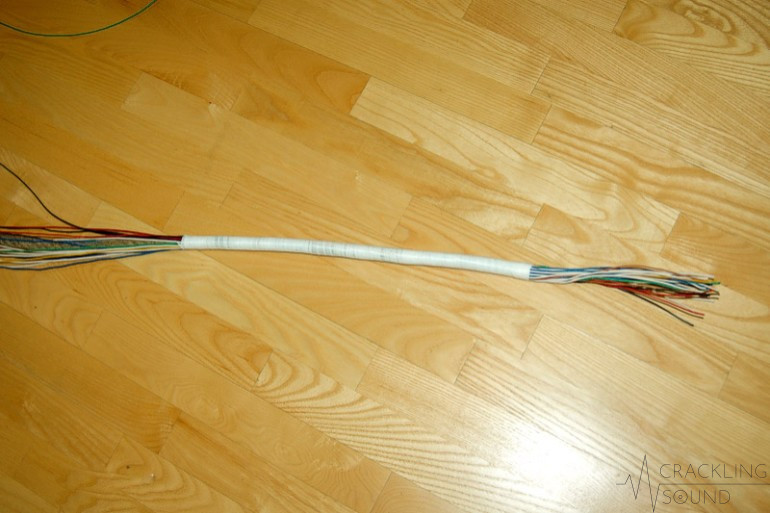
8. Wrap the cable again with a layer of PTFE sealant tape

Wrap the cable again with PTFE sealant tape
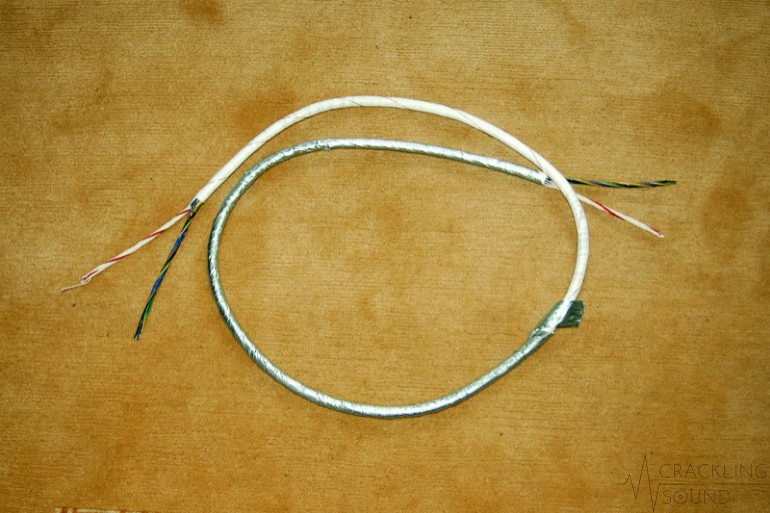
9. Put on the snakeskin and shrink tubes, and heat the shrink tubes to squeeze.

Put on the snakeskin and shrink tubes
10. strip the ends of the wires and mount the connectors. At one end of the cable at the – pole, connect the drain wires from the shield, and mark that end (I marked it with a small red piece of shrink tube at the – pole), because that end connects the cable to the amplifier.

Mark your negative pole wires
11. check with an ohmmeter that there is no short circuit, ie that the conductors are properly spaced at both ends.
Best DIY Speaker Cable – The Conclusion
In the end, the question of the sound of this cable remains. By comparison, so far, the cable has proved worthy of publishing the instructions for its manufacture in this form. So far I have compared it in two systems. First in its own, where it is compared with also DIY cables of its own construction, more precisely with ordinary terminated Y (ST) -Y cable of 6 pairs. This cable, in addition to a more impressive look, has gone a step further in overall sound quality. In the second system, it was compared to one very similar cable (Audioquest Midnight), and one conceptually different (Supra Ply 3.4S).
Compared to the first cable, it showed greater openness, dynamic, and liveliness. The basic character is very similar, which is not surprising due to the similarity of the construction, but to my surprise, the sound was much better in the above characteristics. Personally, I did not expect such a difference. Simply put, the system called for more music listening.
In the second comparison, the fight was more even. The treble and bass were very similar, but the biggest difference to me was in the interconnectedness of the spectrum and the uniformity of the character of the sound across the entire spectrum. The mid-tones on this DIY cable were a little more precise, focused, and connected than on the Supra. I have often had such experiences when comparing cables with full cross-section wires and personal conductors, so I would explain the auditory experience by this difference.
When we look at the price of the material needed to make this cable and compare it with the purchase of cables of a similar price, the conclusion would be that it makes sense to make such a cable, ie that the resulting cables justify the investment.
If you followed my instructions you were able to get the best DIY speaker cable for a small amount of money.
What is the best material for a speaker cable?
You need to look for a quality copper wire made of 100% copper.
Can you use a regular wire as a speaker wire?
Electric wires can be used as speaker wires, but there are limitations. If you do DIY speaker cable try to use a flat cable with 0.8 mm solid wires.

Crackling Sound was created to provide straightforward, unbiased reviews of audio products, catering to those who want excellent sound without delving into complex audiophile terms. I aim to simplify the decision-making process for my readers.
As an audio enthusiast and self-builder for over 20 years, I ensure my reviews are honest, highlighting both advantages and disadvantages. I conduct sound tests to deliver comprehensive and reliable information about various audio devices. My extensive experience in DIY projects, experimenting, installing, and using high-end audio gear helps me provide thorough and comparative reviews.