


If you want to know how to adjust anti-skate on a turntable, the manual’s answer is right on the dial: set it to the same number as the tracking force. This works on most turntables. What the manuals omit is what that number actually means, how to tell by the sound if it’s too high or too low, and why users argue so much about blank records and test records. This guide, part of our turntable setup guides, covers everything you need to know about how to adjust anti-skate on a turntable.
In short
- First set the tracking force, then the anti-skate: Anti-skate is scaled to the downforce, so it is always the last adjustment.
- Start with the dial set to the tracking force value: Audio-Technica and Denon recommend that owners set it to the same value as the stylus force, for example 2.0 for 2.0 g.
- The actual lateral force is much less: Measurements place skating force at approximately 10 to 20 % of the tracking force.
- The distorting channel tells you which way to turn: distortion in the left channel near the end of a side points to too much anti-skate, the right channel to too little.
- The common mistake is using too much: A cartridge rebuilder reports that most of the styli he sees are more worn on the right-channel edge, the sign of excessive anti-skate.
What anti-skate on a turntable corrects
As the stylus drags through the groove, friction pulls it along. A pivoting tonearm cannot directly counteract this force, so some of it is converted into a force that pulls the tonearm toward the center of the record. This is skating force. Without correction, the stylus exerts more pressure on the inner wall of the groove than on the outer wall.
How big is it? Measurements from 1967 give approximately 20 % of the tracking force for an elliptical stylus and between 15 and 18 % for a conical one, while later work suggests closer to 10 %. Skating also increases with louder passages and with a dirty stylus or record, and it changes as the arm moves across the side, so there is no single perfect setting, only a reasonable average.
Before adjusting: tracking force, and does anti-skate work at all?
Anti-skate is scaled to the downforce, so set and check that first using our guide on how to set tracking force. Keep anti-skate at zero while balancing the arm.
On an older or secondhand deck, check that the mechanism works before relying on any number. Owners often perform a simple test: with the arm balanced so that it floats at zero tracking force, turn the anti-skate dial upwards. The arm should swing outwards. If it doesn’t move, the anti-skate mechanism needs checking and no setting will help.
How to adjust anti-skate on a turntable, step by step
Learning how to adjust anti-skate on a turntable properly involves a precise sequence of steps:
- Set the tracking force to the recommended value for your cartridge and confirm it.
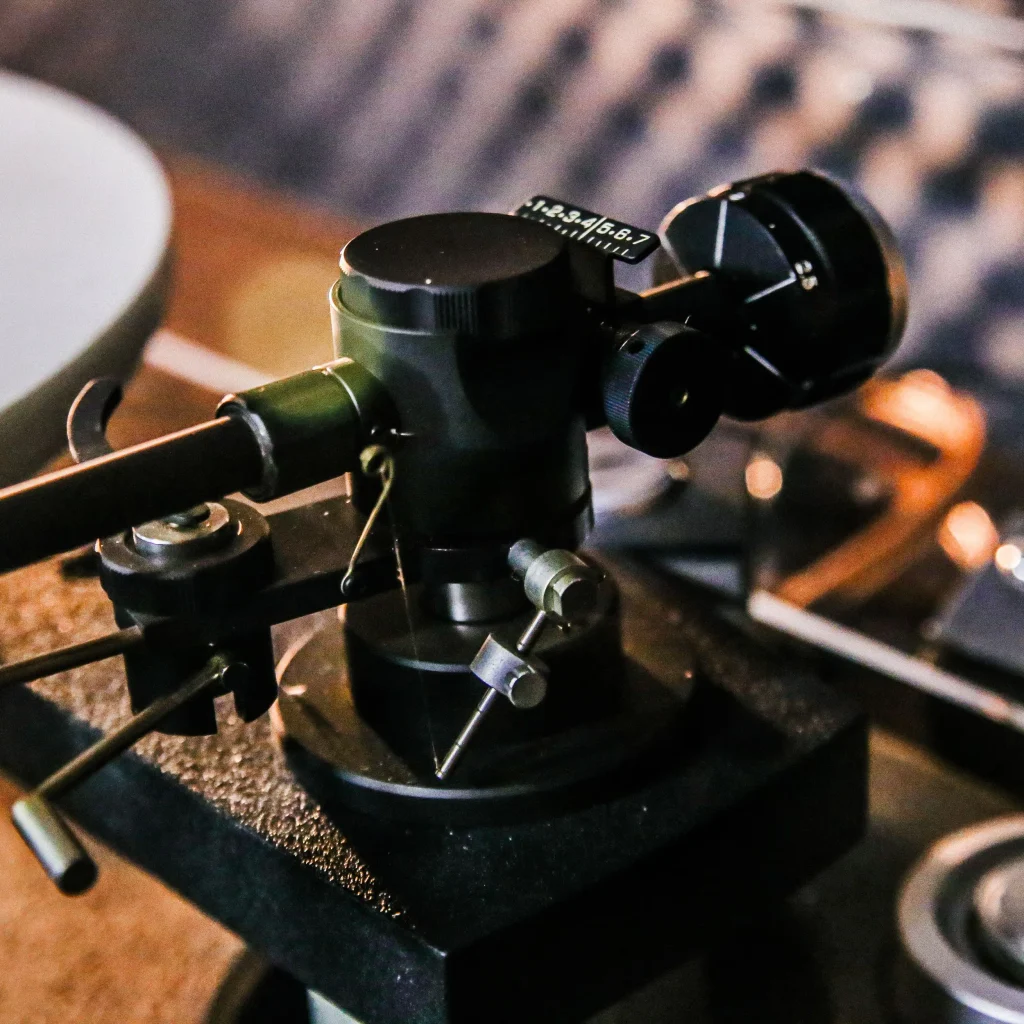
- Find the anti-skate control: a numbered dial near the base of the tonearm, a slider, or a small weight hanging from a thread.
- Turn a dial or slider to the same number as your tracking force (2.0 g of tracking force means 2 on the dial).
- Hang a thread weight in the groove that matches the tracking force, if your deck uses one.
- Play a record you know well and listen to the louder passages near the end of a side, ideally with headphones.
- Adjust in small steps, only if you hear one channel distorting, using the table below.
Dial and slider decks
The Audio-Technica manual for the AT-LP2022 sets the dial to the same value as the tracking force, and Denon’s DP-400 manual gives the same instruction. Rega tonearms use a bias slider set to the same number as the tracking force. Treat the markings as approximate: owners report that dial calibration varies from tonearm to tonearm, and several experienced users run the dial at half to three-quarters of the value of the tracking force.
Hanging-weight decks
The Pro-Ject Debut Carbon EVO uses a small weight on a thread. Its manual says to set the downforce before installing the anti-skating weight, then choose the groove by force. Our Pro-Ject Debut Carbon EVO review covers the arm.
| Tracking force | Anti-skate groove |
|---|---|
| 10 to 14 mN (1.0 to 1.4 g) | 1st groove from the bearing rings |
| 15 to 19 mN (1.5 to 1.9 g) | 2nd groove (factory setting) |
| 20 mN and above (2.0 g+) | 3rd groove |
Which channel is distorting? Reading the symptom
On a stereo record, the left channel is cut into the inner groove wall and the right channel into the outer wall. Anti-skate changes the pressure between the two walls, so an incorrect setting will show up as distortion in one channel, generally near the end of a side, where tracking is more difficult. Owners on hi-fi forums consistently use this rule:
| What you hear | Probable cause | What to do |
|---|---|---|
| Distortion mainly in the left channel | Too much anti-skate | Lower the anti-skate setting a little |
| Distortion mainly in the right channel | Too little anti-skate | Raise the anti-skate setting a little |
| Equal distortion in both channels | Not an anti-skate problem | Check the tracking force, alignment, and wear of the stylus |
Before changing anything, play a new record or one you know is clean. Owners often find that one-channel distortion on some used records is old groove damage from the previous owner’s setup, and no adjustment will remove it.
Watch out
Don’t try to correct the anti-skate on a record that’s already damaged. If the distortion remains in the same place on that record no matter what you do, and other records play without problems, the groove is worn.
What does the number on the dial really mean?
If the skating force is around 10 to 20 % of the tracking force, why do the manuals tell you to set the dial to 2 for a 2 g cartridge? Because the dial isn’t marked in grams of lateral force. It’s marked in the tracking force it is designed to compensate for. A setting of 2 means “the correction this arm needs for a 2 g cartridge”, resulting in a much smaller side thrust.
Myth and fact
Myth: Anti-skate at 2 pushes the arm outward with a force of 2 grams. Fact: The dial is calibrated to tracking force; the actual skating force it counteracts is approximately one-tenth to one-fifth of this.
Too much is the more common mistake
Cartridge rebuilders find that most people use far too much anti-skating. The evidence is the styli they repair: the outer edge of the diamond, the right-channel side, is usually worn much more than the inner edge. Their advice is to set anti-skate for typical music, at around 30 to 40 % modulation, instead of the 80 to 90 % levels seen on many test-record bands. Some owners add a caveat: heavy wear on one side of older styli is also due to cheap record changers and stiff tonearm bearings, not just the anti-skate dial.
Blank discs and test records: why owners disagree
Blank surfaces. A popular method involves lowering the stylus onto a grooveless surface and adjusting until the arm remains still. Critics point out that skating occurs due to friction in a modulated groove, which a smooth surface lacks, and the makers of one anti-skate gauge advise not using a blank record. Cartridge rebuilders do use a smooth surface, but their target is different: adjust until the arm drifts very slowly inwards, not until it stops. If you’re using a smooth surface, that slow inward drift is the safer target, because keeping the arm completely still sets more anti-skate than actual music requires.
Test records. Records like the Hi-Fi News Analogue Test LP feature bands of increasing level that buzz in one channel when anti-skate is off. Users report that balancing the hardest bands can push the setting well beyond the dial rule; one user found his Rega slider almost fully in. The compromise most users adopt is to pass the moderate bands cleanly, accept a slight, even distortion on the hardest ones, and end up somewhere between the dial value and the test-record value.
Worked example
A model check with a 2.0 g cartridge. Set the dial to 2. Play a loud, sibilant track near the end of one side of the record through headphones. If the harshness is concentrated in your left ear, turn the dial to 1.5 and play the same 30 seconds again; if it’s concentrated in your right ear, try 2.5. Keep the setting where the loud passages sound cleanest and most even, and return to 2 if you don’t notice any difference.
Two free checks: a mono record and the cantilever
A mono record on headphones. A mono recording sends the same signal to both channels, so with anti-skate properly set, the sound image should be right in the center of your head. If the voice shifts to one side or one ear sounds harsher, adjust it gradually.
The cantilever. With the record playing, observe the stylus from the front. The cantilever should be straight beneath the cartridge body, without bending toward the spindle or the edge. If the cantilever is visibly bent, it means the lateral forces are unbalanced.
Tip
Make anti-skate adjustments in steps of a quarter or half a number, cleaning the stylus first and using the last tracks on a side as a guide. A dirty stylus increases friction and can make a correct setting sound wrong.
To measure instead of listening, the WallySkater v2.1 has you adjust anti-skate until its indicator shows approximately 9 to 11 % of tracking force, measuring at an outer and an inner point, and costs $260 (as of 11/2026). Most owners do not need it.
Summary
To successfully master how to adjust anti-skate on a turntable, first set the tracking force. Start with the dial at the same value and listen to the end of a side of the record: distortion in the left channel indicates too much, and distortion in the right channel too little. The dial represents the tracking force being compensated for, not grams of lateral thrust. It’s better to set it below the dial value than above, and use a mono record or the cantilever as a free check.
How to adjust anti-skate on a turntable – FAQ
What value should I set my anti-skate to?
Start with the same value as the tracking force, as recommended by Audio-Technica, Denon, and Rega. If loud passages near the end of a side distort in the left channel, lower it slightly.
How can I tell if my anti-skate is correct?
The loud passages near the end of a side sound clean in both channels, a mono record images in the center when listening with headphones, and the cantilever remains straight during playback.
What happens if anti-skate is too high?
The stylus leans on the outer wall of the groove, which normally shows up as distortion in the left channel and wears down the right-channel edge of the stylus more quickly.
Can I set anti-skate without a test record?
Yes. Start with the dial rule and then fine-tune it by ear using a record you know or a mono record on headphones.
Should I use a blank record to set anti-skate?
It’s a disputed topic. A smooth surface has no groove friction, so keeping the arm completely still sets too much. If you use one, aim for a very slow inward drift.
Sources (7)
- Stereophile: The skating force phenomenon, As We See It column, summarising Kogen (1967) and Boisclair (no date, verified 11/2026). www.stereophile.com/content/skating-force-phenomenon
- Audio-Technica: AT-LP2022 user manual, Setting the anti-skate adjustment (no date, verified 11/2026). www.audio-technica.co.jp/document/AT-LP2022/en/Content/Turntable/AT-LP2022/preparation/setting-anti-skate.html
- Denon: DP-400 online manual, Adjusting anti-skating (no date, verified 11/2026). manuals.denon.com/DP400/ALL/en/OBAOSYrthuhssh.php
- Rega Research: RP3 turntable user manual (no date, verified 11/2026). www.manualslib.com/manual/458383/Rega-Rp3.html
- Pro-Ject Audio Systems: Debut Carbon EVO, instructions for use (no date, verified 11/2026). www.henleyaudio.co.uk/Media/downloads/products/PJAADCEVO/PJAADCEVO_User Guide.pdf
- Soundsmith: Do I need anti-skating? (no date, verified 11/2026). www.sound-smith.com/node/86
- AnalogPlanet: WAM Engineering’s new, improved WallySkater V2.1 (no date, verified 11/2026). www.analogplanet.com/node/123725
